How to Set Up and Sell an Empowerment Course
Hi there, coach or expert! Want to launch a gorgeous and inspiring online course for the New Year, the new season, a new client, or just because?
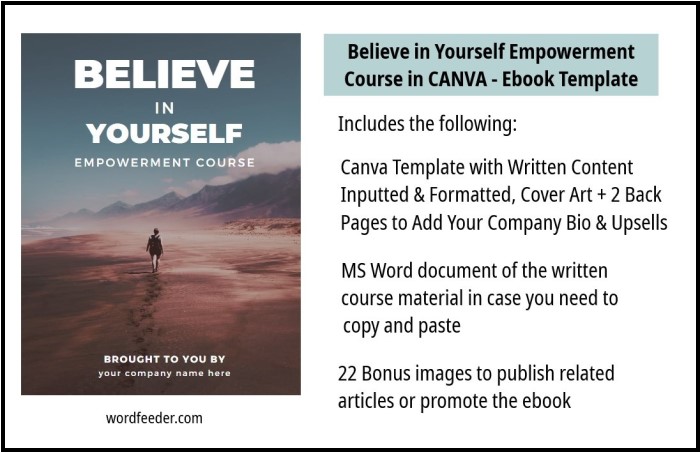
The Believe in Yourself! Empowerment course is ready and waiting for you to share this with your readers, guide them expertly and make a positive impact.
Let me give you a few different scenarios on how EASY it is to set this up and start selling.
Offer this course as an affordable alternative to pricy coaching hours. Feel free to grab this helpful tutorial and save it in a document of your own so you can reference it later if you need to.
How to Set Up a 15-Day or 30-Day Challenge or Autoresponder Course and Sell It
Do you already run a membership area on your site? Many people in the online business world have integrated their regular, blog-based websites with aMember software. This software currently costs less than $200 to purchase and begin using.
If you have only ever used aMember as a buyer of content, then you may want to now entertain the idea of setting it up as a coach who offers a private membership to your customers.
This is a really neat way to deliver learning materials, training, business-building resources and special coaching packages via a private area of your site that members can pay a flat monthly, bi-annual, or yearly fee to sign up for.
One of the best features of aMember's database is that you can quickly and easily set up an autoresponder series that people can sign up for. Your series can be offered free, or you can ask for payment.
I'll give you the quick series of steps to run through so you can start profiting by sharing a value-rich online course.
- Have your empowerment course content ready to copy and paste. Check the word count to see how many days' worth of an autoresponder series you'll be able to set up. Three thousand words will probably be 5-day mini course. Something like 15,000 words is enough to make into a 30-day challenge.
- Log into the admin area of aMember. Go to PRODUCTS in the left sidebar. Set up a new one and name it. Let's call our course Believe in Yourself! Empowerment Course. Fill in all of the product details.
- Next go to the EMAIL MESSAGES area under PROTECT CONTENT on the left. Create a new Welcome Email. Type in your welcome message to people who have just signed up for the course. Add an intro to your course.
This and any other email that you create that's associated with this product can also contain an attached document that people will receive after signing up for the course. So if there are any special resources that you'd like to share, you can attach the files to this or any other of the autoresponder emails that will be associated with this course. - Now create a new AUTORESPONDER email. Paste in the first article and exercise that you'd like to share in your series. When you get to the bottom of the form you want to designate that this will be Message 2 in the series. Be sure to designate which PRODUCT will be associated with this email by selecting it from the dropdown list. Fill in all details. Save your message.
- Continue creating new AUTORESPONDER emails, designating the numerical order of each one in your series, and making sure to check off the Believe in Yourself! Empowerment Course as the product that will be associate with this automated email.
- After you have a full 30 (or however many days you plan to run your course), you'll want to create a SIGNUP FORM that will allow people to sign up for your course online.
Under CONFIGURATION in the left sidebar, find FORMS EDITOR and click it. Create a new form. Name your form something like "Sign Up! "Believe in Yourself! Empowerment Course". Designate all the appropriate, associated details with your form. For example, product name, ability to select more than one product, payment type such as PayPal, coupon code, and more. I am giving the basics here, so if you need more details please refer to aMember's software tutorials. - One you're done creating your form, save it. aMember will generate a link that's associated with the form. If you want people to see the checkout page of your member area where they can sign up, you have to share this link. It will look something like this: http://yourdomain.com/amember/signup/x7fw90sbc
- The end user should be able to click the link you send them, see the checkout page, enter their payment information, select the course (or other products of yours) that they'd like to purchase, and then put their payment through. Once it's processed, they will receive an email from you. The email will be the same email that you set up as the Welcome Email that people see after they sign up for your Believe in Yourself! Empowerment course.
How to Set Up Your Empowerment Ebook for Automatic Paid Download
Not everyone wants to create an autoresponder series, and it's okay if you don't. Maybe you've never done it before, or maybe you want your online course to be an ebook that people can just order once and not have to log back in again and again. You just want them to make an automatic online payment in exchange for an MS Word document or PDF that they can download.
If you'd like to share a PDF with your readers AND you don't yet have a membership area for them to join or log into, you can use a program called e-junkie.com. This is an extremely intuitive, easy-to-use program that will allow you to quickly and easily create a product name/number, description, and then upload a PDF file that will automatically be emailed to your purchasers upon receipt of their payment.
Another possibility if you don't have a member site software like aMember is to have people sign up for your course using your list manager such as aWeber.AWeber allows you to create a new, targeted list from scratch and begin sending a series of autoresponder emails to this specific list.
The only drawback here is that you won't be able to automate the process of people paying and then getting an instant email that starts the autoresponder series. Instead, they will have to contact you, you can invoice them via PayPal, and then once you receive their payment you can manually add their email address to the special list that you've set up in aMember.
From there, you will have set up your series of autoresponder emails under BROADCASTS, in much the same way as I described in the first portion of this tutorial.
How to Run an Empowerment Course on Social Media
Another fun thing that you can do as a coach to inspire and motivate your readers is to run an Empowerment Journaling course on social media. We're getting away from the automated aspect of this, but that's okay. If you normally work one-on-one with clients, this will be very similar except that you'll be working with a small group which can be a lot of fun.
As a preliminary, you should have your content ready to present in ebook format. If you purchased the course from Wordfeeder then this will be already taken care of and it will save you a ginormous chunk of time, energy and effort if you had to write this from scratch or hire a writer to draft it up for you.
Your first step will be to let the people on your mailing list know that you're going to launch a special empowerment course over the coming month (or however long you'd like to run your course for). You devise the schedule that you want.
You could decide that on Day 1, you distribute the learning materials, and then everyone agrees to go off on their own, study the first section of the ebook, write out their own journal entry, and then all members come together in your private member area on Facebook to discuss.
So let people know about that, then set up your private group. You can opt to create some inspiring graphics as part of the course, to share each day and get people excited for that particular area of study/ journaling exercise.
Once all of your branded materials are created and ready, put the word out that you'll be accepting PayPal payment from anyone who would like to participate in your journaling class.
Upon receipt of payment, they will gain access to the Facebook group (you'll have to manually add them). You can also send them a Welcome Packet email containing all of the materials that you plan to utilize in the course.
A good way to ensure that people sign up in a timely fashion is to create a limited number of spots, such as 12. This will also be a good way to project how much profit you can collect by hosting your empowerment course.
So let's assume that the class will run for an hour each day, 4 days per week, for 4 weeks. You're putting in 16 hours of your own time for this.
If you charge $50 per head for the class, and you book 12 students, then you make $600 at the end of your month-long course. But you don't have to stop at 12 students. You could invite 20 people and then come home with $1000 at the end of your month, for this one course.
You could also op to offer "spot coaching" to anyone who would like to privately get some extra support from you and work on one or more of the areas that are covered in the course.
So as you can see, you have tons of options for using this content to help other people, deliver valuable information and inspiration, and provide affordable solutions for them.
How to Set up a Daily Empowerment Journaling Class in a Private Area of Your Blog
You can also run your empowerment course from a private area of your blog. This again will not be automated. You'll have to email your list and let them know that you're planning to host an empowerment course for the month of February or whenever you plan to do it. Then, log into your hosting area or call your host provider, and set up or have them set up a password-protected area of your website.
Utilizing the existing, purchased online course content, you can paste each section, along with its own included journaling exercise, into a blog post.
Publish the post, and make sure that it's only visible in the privacy-protected area.
After your students remit payment, you can email them the password that they'll need to log in, read the blog posts, then follow the instruction for writing their own journal entries that correspond to each section of the course.
You may also give your students an option to "upgrade" and have you review what they've written, or get on a call so they can discuss their goals or their challenges with your coaching support and input.
There's really no limit to how you can run this, as long as you remember to think creatively, problem solve, be open to suggestions from your clients if they have ideas, and brand the content to your heart's desire!
PS: Want an all-in-one teaching tool to launch automated courses as a coach or expert? Try Teachable or Ruzuku.
If you'd love to get your hands on the highest quality coach's empowerment course material around, then take a look at the offer we have going on at Wordfeeder. You get $20 off the list price of $64 for this beautiful, inspiring, professionally-written material that would run you thousands to have a professional writer create for you from scratch.
There's no limit to what you can do with this illuminating and motivating, done-for-you empowerment course that your readers will absolutely love you for sharing! Use coupon code BELIEVE at checkout for your discount... available for a short time only! Go here now to learn all the details.
Thanks for reading... let's make a ton of money and help a ton of people this year!!
Dina at Wordfeeder PLR